


A Deep Dive Into Stereo Width
- May 9, 2022
- 23 min read
Updated: May 28, 2024
Welcome to the fifth edition of my Pro Producer's Tips series! This time the topic is all about width, a fundamental parameter to understand correctly to give your productions and mixes the wings (as metaphorically the cover art of this blog post suggests) to fly and shine, like a metamorphosis and natural evolution from a premature and closed cocoon into a proud and beautiful butterfly.
I've done pretty extensive research this time because I like to get deep and experiment to find out more unconventional and creative techniques, so it will be a very long post without the claim to be 'the ultimate guide to..' or 'everything you need to know about..' since, as always, knowledge is unlimited.
Because of that, my humble goal is to inspire other people and artists with both my discoveries and common practices, so please feel free to comment down below with your thoughts and anything that comes to your mind.
Now it's time to start our journey, take a cup of tea or coffee, sit back, and enjoy!
Understanding the principles
It's often said that a mix has three dimensions: height, depth, and width.
Here we are focusing our attention on the latter one but keep in mind that these dimensions are correlated and not separate worlds: for example EQ, reverb, and pan, while candidates to represent the aforementioned categories respectively, can influence more than one category at once as we will discover.
To put it in the simplest form, width in a stereo mix is achieved by creating differences between the left and right channels; in fact, the mono channel represents what is shared and common between the two channels, while the side contains just the differential parts.
Now, how can you create differences between those two channels?
There are many many ways to do that, the only limit being your imagination once you have grasped the concept.
I will attempt to provide you with a wealth of proven techniques to try for yourself so that you can go on and keep experimenting with a more clear vision of what you're doing and trying to achieve. Let's get started!
2. Width Techniques
- Autopanners & Rotary effects

One category of effects really useful to add stereo interest is autopanners.
I use them in every project I do because they are so effective and simple to use. The idea is to move some sounds in the stereo panorama in a rhythmic fashion, by syncing the movement to the tempo or applying free modulation.
As you may know, panning in a DAW is achieved with volume differences between the left and right channel, so by moving a sound to the left you are getting less volume from the right channel and vice versa.
Later in this article, I'll discuss how to create a psychoacoustic panner that sounds more natural and realistic, by constructing an Ableton rack which you can download for free ;)
In the following video tutorial, you'll first hear a very centered DnB loop followed by a version of itself with some autopanners involved: to the hi-hats with a random LFO employed to create a more unpredictable movement, to the snare very slightly for a less repetitive stereo placement of each hit, to a pad with an automated slowing sync rate for a tremolo-like effect, to the bass with various sync rates for each part of the loop.
Keep in mind that when using auto pan you are lowering the focus on the center of the stereo field so you may want to compensate for the loss in volume with a utility gain boost (usually from 1 to 3 dB based on how drastic you go).
In this example, almost every element apart from the kick has been auto-panned to show various scenarios and applications but in a typical situation, you may want to be more subtle because contrast in music is key as it keeps the most important elements centered and focused.
Also be careful when using stereo effects to bass elements as they may lose mono-compatibility, a fundamental aspect I'll focus more deeply on later, so a better idea would be to mono-ize the low to sub-bass (like below 100 Hz) and apply some autopanning or other special effects to the frequencies above.
Be careful also with the stereo balance because, for example, a sine wave LFO in an autopanner creates an equal movement from left to right but other asymmetrical waveforms concentrate the effect more towards a channel than the other.
Another interesting technique to try with autopanners is using them with MIDI or audio triggers.
In reality, this is great to try with any kind of effects like distortion, compression (the side-chain technique involves using an audio trigger indeed), and so on, because linking the movement and application of audio processing to a sound based on the timing event of another makes for compelling sonic interactions.
In the video tutorial, I used a MIDI trigger that clones the kick pattern to restart the cycle of the autopanner applied to a pad.
Some free auto panners I suggest trying if your DAW doesn't have one, are PanCake by Cableguys and Panstation by Audio Damage.
- Width with Delay & Reverb
Delay and reverb are fantastic tools not only to achieve depth in a mix but as we'll see width too.
You don't have to necessarily create an obvious delay or reverb effect to achieve width, you can be more subtle with short decay times.
With delays try slightly different settings between the left and right channels and hear how starting from a mono source you'll get a wider stereo image.
With reverbs, to achieve a similar effect, you just need the early reflections, which are short and give the sense of space, so shorten the decay times and late reflections if you just want the widening effect.
In the ValhallaRoom plugin, the Depth control sets the balance between early and late reflections so by turning it to 0% you are isolating just the early ones:

In more capable reverbs like this one you have a very deep control on early and late reflections separately, so you can customize the effect as you like.
Try for example a small size room mode with a high early reflections density setting.
Other parameters worth exploring are the pre-delay, which creates a separation between the dry signal and its wet version (responsible for giving a clue of the size of the room too), and the stereo dials if present (in the Ableton's stock reverb it sets how much the reverberation is independent between the two channel, hence a much wider result).
For greater control on the widening effect try to isolate and monitor the side from the mono with a Mid/Side encoder plugin like the free MSED from Voxengo and just listen to the added stereo information you have added, then you'll have a better understanding of what you are achieving.
In the following audio example listen to how the mono bells open up when using this widening technique with a reverb having a short decay time:
To achieve a similar effect using mono delays or mono reverbs you have to create two copies of the same mono source, hard-pan them left and right, and apply the mono effect of your choice to one or both copies with different settings on each.
- Width with Modulation Effects
You can also create width using modulation effects like choruses, doublers, phasers, flangers, frequency shifters, and so on.. the idea is always to create differences between the two channels without having to drown the sound into an obvious wet result.
Choruses and doublers can create a detuned effect similar to the micro-shifting technique that we'll explore later.
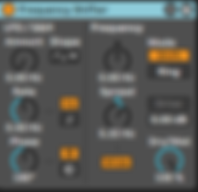
In Ableton try moving the 'Spread' dial in the Frequency Shifter by a small amount like +5 Hz with the 'Wide' button engaged: in this way the right channel is phase flipped to the left one, achieving a wide stereo effect.
The problem with this is that when summed to mono you can experience some weird results due to cancellations between the two channels.
Always check in mono after doing such tricks to fine-tune the effect, if you care about mono compatibility.
- The infamous 'Haas' effect
A well-known technique you may have heard about to achieve a sense of width is the so-called Haas effect.
This involves using a short delay time of less than 30 ms (an amount higher than this is perceived as a distinct repetition) to the left or right channel.
Also known as the precedence effect it relies upon the way we hear in real life: the time differences between the left and right ears are sonic clues that tell our brain the direction a sound is coming from. So if we apply a delay of, say 20 ms to the right channel only, we perceive the sound coming more to the left.
While this can be effective in creating a dramatic stereo-widening effect, it must be noted that in mono you'll experience comb filtering and so a thinner, altered timbre because you are summing a sound with a delayed copy of itself.
The way you can counterinteract that is by doing this: create three copies of a mono source, hard pan one left, one right, and the third one leave it centered.
Lower the volumes of the three copies and apply a delay with an effect or with a function like the Track Delay present in Ableton to one of the two hard-panned copies with a maximum of 30 ms or so.
In this way, the centered copy, which is mono like the original, preserves the mid presence and so gives the haas effect more mono compatibility.

In the following audio example you'll hear the previous 'Agogo Bells' loop first mono, then with the Haas effect applied, and finally with the addition of the third centered layer:
I will stress more throughout this article the importance of mono compatibility and some techniques that can preserve that more.
The idea is always to apply slightly different processing to the left and right channels, but to have full control of the effect we can work on the side channel only as a layer to the mono (mid) source as we will see later.
- Stereo Enhancer Plugins
Now that we have a better understanding of how to achieve stereo width let's explore specialized plugins that do just that, or claim to increase it.
How do they work? They most probably will employ one or more of the techniques explored throughout this blog post, but I suggest you investigate more deeply by reading the manual or the plugin's internal hint boxes.
If they sound generic, make some tests for yourself by comparing various stereo enhancers, listening carefully to how the sound changes when you crank up that 'width' control, and taking a closer look at vectorscopes and correlometers to also see what's going on and if something starts to go out of phase.
This will help you decide what's best for you.
Comparing plugins realized for a similar purpose is a great ear training exercise indeed, and you can do that with EQs too, for example using software like the Plugindoctor by DDMF or the free EQ Curve Analyzer by Bertom to help you visualize similarities or differences when using the same curves.
Some great free tools I suggest when doing the width enhancement test are Voxengo Correlometer, Izotope Imager 2, which has a dedicated visualizer and stereo spread feature too, and Flux Stereo Tool v3.
Talking about free stereo enhancers there are aplenty, like Wider by Polyverse (which I tested in the video and even at extreme settings remains mono-compatible!), Dimension Expander by Xfer Records (which works with micro-delays like the old FX from the gold Massive synthesizer) and Stereo Touch by Voxengo, but there are many many more.
One of my favorites is SideWidener by Boz Digital Labs and Joey Sturgis Tones and it's part of the CM Plugin Collection, which means you get it for free by purchasing any number of the Computer Music Magazine (yes, I've been a subscriber and reader for like seven years now, but I don't get any percentage by telling you this, it's my honest opinion since here it's my blog and the place for my thoughts :P).
What I find cool about SideWidener is that it has three modes of widening with a diverse effect, it's quite mono-compatible and it also has a handy 'Tone' knob to concentrate the widened signal more towards the mid frequencies or leave it more open to the highs (like a filter applied to the side).

In the following video walkthrough, I go over some of these plugins starting from the same source that first turned completely mono, and you'll hopefully hear how many different width effects you can achieve so that you'll eventually be curious about exploring more of the ones that you already have in your toolbox, but also be more careful to not rely on them blindly, without knowing exactly what they are doing to your audio.
That's why sometimes they can be quick and effective when used consciously, other times it's better to do things 'manually' for yourself.
Among the paid-for software there are some pretty cool plugins I suggest investigating more like:
Cableguys WidthShaper, which has a lot of nice features for creating stereo effects;
United Plugins Expanse 3D, which tries to fill the three dimensions of width, height, and depth in a mix;
Waves Brauer Motion, a 'circular stereo auto-panner' with four different panning modes;
Klevgrand Haaze, a simple to use yet clever tool for adjusting for instance panning and haas effect on specific frequency bands only;
Sound Particles Energy Panner which was given for free recently and looks pretty cool;
Goodhertz Panpot, a more advanced panner with psychoacoustics in mind (we will build our own at the end of the article!)
- The Microshift Technique
This technique involves using pitch as our variable for getting variations between the left and right channels.
So far we've explored time (for the Haas effect for example), level (for autopanners), and space (using short reverbs, delays, or modulation effects) as variables to employ to achieve width, but there are many many more as we'll see across this article.
If we consider timbre for a second, imagine how many different parameters you have at your disposal to modify it: the only limit is your imagination.
For instance, combining hard-panned sounds in opposite directions with a contrasting and complementary tone is another great way to achieve width, a technique usually employed by guitarists for a wide guitar's wall of sound.
But turning our attention back to the micro shift technique, as you can tell by the name, it involves creating very small pitch variations between the two channels.
If you want to do that manually try to shift the hard-panned copies of a mono source by a few cents (1 semitone equals 100 cents ) in opposite directions and listen to how the sound opens up without resulting in an obvious detuned effect.
Some plugins really good for that are MicroShift by SoundToys and Ultrachannel by Eventide, which has a dedicated 'Micro Pitch Shift' feature built inside it.

Another way to achieve a similar effect is by modifying formants, for example when time-stretching a sample you have at your disposal some controls to modify that (in Ableton, the Complex Pro time-stretching algorithm has it).

- Width with Phase
Let's look at another fundamental parameter in audio: phase.
Understanding that is crucial also for grasping the concept of mid-side encoding.
In the following walkthrough demonstrational video I've done some tests by duplicating a stereo audio track and working with panning and phase alone to achieve different results.
Ableton didn't have a proper dual mono pan since version 10 I believe, but now it has the handy 'Stereo Split Pan' feature that splits the single pan dial into two sliders to control separately the pan of the left and right channels of a stereo track.
What I've done first in the duplicate is turning the left slider to the right and the right slider to the left to invert the channels (I could use the Swap function inside the Utility's menu but I wanted to make it more visually clear in the video).
In this way when summing the duplicate with the original, by applying basic math, we are doing the following: L + R and R+ L, and since we've put the left channel to the right channel in the duplicate (and the other way around) we've mono-ize the result because now the two channels share the same audio information.
(Remember that mono is also called mid).
Next, I've flipped the phase of both channels in the duplicate so when summing with the original we are doing the following: L - R and R - L, so we are subtracting the two channels from each other, increasing the side.
This is another effective technique for achieving width and if all of this sounds convoluted to you, a simpler option is to increase the side with a dedicated plugin that does the mid/side encoding internally like the free MSED from Voxengo, and decrease the Mid at the same time.
The final thing I've tried in the video is to sum the original with a phase-inverted copy.
You guessed it, that's the effect of phase cancellation: L - L and R - R.
Another technique you may want to try is flipping the phase of one send mono effect panned to the opposite way of the non-flipped send mono effect copy (in this way you are getting just side information from the send channel).
By doing so you are getting a wide effect when listening in stereo that cancels out in mono (remember that when summing to mono you are removing the side):
you get a dry and polished version in mono, where you have less space in the mix due to the channels collapsing into one, and a wetter, more compelling version in stereo: the best of both worlds.
- Double Tracking
This is a very popular recording technique you may be familiar with already.
It involves re-recording for example a guitar line or vocals to create doubles and thicken up the timbre and increase width.
Talking about the latter, the topic of this article, it naturally happens that two recordings will never be the same, so the differences in timing, pitch, timbre, etc. even if subtle, can create a really wide stereo panorama when hard-panned.
Think about heavy distorted electric guitars for a wall of sound and many layers of vocal harmonies for larger-than-life choirs. I talked about 'double' tracking because usually we just need two tracks to create a stereo image but you can create as many layers as you want for an even richer result.
In the following audio example, I've started with a stereo choir sample and made transposed copies of it to simulate the addition of more voices and harmonies, to get a deeper and wider sound.
Remember anyway that two different recording takes are going to sound wider and more natural than one take sent through a doubler effect.
Hence, the good practice of starting ahead of time with the right mindset instead of fixing it later.
If you have a good pair of microphones then a well-done stereo recording is a great place to start instead of adding artificial width later on.
- Width with EQ wizardry
This is a technique a little more advanced but super cool to try:
EQ-ing the left and right channels independently.
If you start with a mono source, let's say a clap sample, and boost/cut in the same frequency range the left and right channels in opposite ways you are effectively creating differences between them but with the maximum degree of mono compatibility, since the two curves cancel out in mono.

Since EQing alters the volume of specific frequency ranges, it's natural that if we boost the right channel and cut the left we will hear the sound coming from the right as if we panned it;
but if you compensate for that by doing the opposite (boosting the left and cutting the right) in another frequency range you will come up with a more balanced result, wider than the original mono sound. Try it for yourself!

Another cool technique and more experimental/sound design oriented you can try with EQs to achieve width from a mono source is creating narrow cuts at different intervals between the left and right channels, and automating the bands at different speeds.
In this way, you are generating a moving comb filter with an effect similar to a flanger.

In the audio example below I turn a mono bass sample into a wider version of itself by employing a series of the aforementioned independent moving comb filters between the left and right channel.
I used them in series to get steeper notches, hence a more dramatic effect.
Also, notice that this creative technique involves altering the timbre of a sound, so don't expect this to be mono-compatible.
- Width with Contrast
This is more of a philosophical and wider (sorry for the word pun) topic:
the use of contrast in music.
This may seem obvious but if we want something big, there should be something small in the mix, if you want depth there should be layers of 'distance' (like different reverb settings: short, medium, and long) and the same applies with width:
Wider mixes tend to have the most important elements mono and focused on the center so that stereo sounds can appear by contrast much wider and more defined.
Many mixing engineers try to make a great mono mix first and afterward spread some elements in the stereo panorama.
Remember: if a mix sounds great in mono, it will sound even better in stereo but not vice versa most of the time.
It all comes down to perspective. So it may seem counterintuitive but to achieve a wider and more polished mix try to mono-ize some sounds first, even effects, starting from the most important that should be upfront like lead vocals and basses.
Don't underestimate the use of mono effects like mono reverbs either:
they sometimes make for a less cluttered and masked result because if you just use stereo reverbs on many sounds you may end up with an undefined, flat cloud with no sense of depth.
Next time you open up a stereo effect think firstly if you need it to be stereo, and if you want that, maybe try to create two mono instances for the left and right channels to customize more the effect.
Maybe try even to remove altogether the stereo information by first mono-izing the sound, then build your width manually for ultimate control (similar to gating or removing the reverbed tail from a source to give it a completely different reverberation).
Something you can try too is creating a call-and-response phrase between a mono sound and a wider one, a technique that has been employed very effectively in EDM to create very impressive and powerful drops.
Contrast is directly bounded by the concept of variation and movement over time:
a good sense of width can be achieved with clever arrangement decisions too;
for example in pop music verses are more centered and choruses have more elements spread out to give more impact to the listener.
As a brilliant example listen carefully to Attention by Charlie Puth and to the way he keeps switching throughout the song from very centered and minimal sections with just lead vocal and guitar or bass, to more busy sections with wide harmonies, countermelodies, and flourishes.
To anticipate the paragraph about width in mixing, experiment with automation to switch between mono to stereo in some sections of your composition.
I stressed about the three dimensions of mixing but there are four actually, the fourth being time!
What I like to say is that music is repetition with variation, a mantra that I always try to keep in mind to create a piece that is not boring (too much repetition) nor that sounds disjointed and without a real direction (too much variation).
Quoting Waves blog this time: "Mixing is about continual change as the music unfolds, using textural contrast to keep things interesting from start to finish".
So to wrap this paragraph up, contrast and variation are key, even when talking about the differences between the two channels of our stereo mix to achieve width.
- Width with Panning
Here we are resuming and calling up what we started with panning.
As simple as it may appear, it's a fundamental tool to create a virtual sense of how sounds are placed in our stereo image.
Think of a real orchestra: players sit in a semi-circular shape and listeners (the luckiest with a really good listening spot) naturally hear a sense of width from how they are disposed.
We can virtually recreate that in our DAW, for example starting from a drum kit we can pan the individual hits the way they are displayed in front of a real drummer, with the kick and snare more central and hi-hats/rides more lateral.
Try taking two different percussion lines with slightly different timbre and placing them on the opposite sides of the stereo field to get a compelling sense of width.
It's worth trying to experiment with panning mono effects too, to focalize them in a specific place: instead of having a send reverb where many sounds are fed and spread together, to create separation, if that is what you are after, you can pan the reverb send to make room for other effects in the mix.
- Width in Sound Design
When doing sound design, a really good mindset to have is the deconstruction viewpoint: think of a sound as a complex organism full of many parameters and try to separate them to focus on just one at a time.
One of them is certainly width: try sound designing right from the start a sound to appear wider, to have full control of the effect you want to achieve, for example by employing detuning on oscillators, independent filter chains for panned oscillators, stereo effects, and modulations.
don't just put on a random sound a 'Dimension Expander' effect and hope for the best, because in certain cases it may ruin your sound and create phasy, bad results.
Always think about the goal you want to achieve and experiment consciously.
Don't forget about the power of parallel processing either: you can create a deep, solid mono bass tone and send it to a bus where you can in parallel add in a filtered, distorted, and wider top layer for instance.
In this way, you ensure mono compatibility because the two layers are not interfering with each other but they are complementing.
You can also try to design a side-only layer to put on top of a mono sound;
in this way, you have total control over the stereo information you are adding.
This is a technique Noisia mentioned employing a lot: to create a really special separation but at the same time sense of fullness in their mixes, they make each sound do just their own thing without disturbing the others, both frequency-wise and width-wise; for example, a punchy mono bass tone may sit well with a thin and sizzle side layer lead.
They indeed have a very engineering mindset when producing and they undoubtedly are masters of electronic music and amazing sound designers.
Now more and more developers are starting to design products with the idea of separating transients from the body, sustaining part of a sound like Quantum by Wavesfactory or Split EQ by Eventide.
This is interesting for sound design and mixing scenarios;
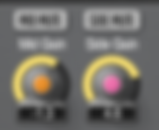
talking about width in particular, the Waves Center plugin lets you adjust the spread of transient content with the 'Punch' knob:

What I suggest is to experiment with adding unique side information to your mixes, by employing new tools or old ones in unconventional ways.
For example, in my first blog post about NY Compression, I suggested the idea of using independent NY Compression settings for the left and right channels to get a nice stereo effect and rhythmic interplay between our ears.
- Width in Mixing & Mastering
We already talked a bit about the mid/side in the phase paragraph, but let's dive into it some more.
The ability to process the mid information and just the side one independently is really powerful and if used well it can help you maximize the width of your productions.
It's also very handy for analyzing more deeply as a reference your favorite tunes.
Mid/Side EQs are more often employed in mastering if the engineer has to work with just a single stereo file and he wants to fix just something from either the mid or side, for example cleaning the low end by high-passing the side only.
A similar solution would be to use a multiband imager and mono-ize the frequencies below let's say 100 Hz.
Talking about multiband processing it can be really helpful to differentiate the role of frequency ranges in the stereo panorama.
Starting from the lowest range and going up the spectrum you may want to create bands with an incremental amount of width: the highest band with frequencies above 16 Khz usually is spread out to give 'air' to mixes and masters.

Another technique to try is mid/side saturation and compression:
again, in tandem with the concept of contrast, it can be cool to try different sonic qualities on your mid and side channels.
Usually, the mid is more compressed for solidity, focus, and better presence in mono systems, while the side can be left more dynamic, open, and saturated for color.
As I said at the beginning of this article, EQ is a crucial tool responsible for all three dimensions of mixing, depending on how you are using it:
height (the most common use in managing frequencies), width (for example with the techniques mentioned by using it in L/R or Mid/Side mode), and depth (brighter sounds tend to appear closer to the listener for example, as louder and drier ones tend to be).
Keep in mind also that our ear is particularly sensible to the mid frequencies around 2/3 Khz, the so-called 'presence' zone in mixing, so not having many sounds compete in this range in the mix makes for a less ear-fatiguing listening experience and a less close in your face mix (it, of course, depends on what artistically you want to achieve, Skrillex basses sound so loud also because they have plenty of information in the presence zone. It's sometimes called the aggression zone for a reason!).
Furthermore by cutting gently in this area and boosting the edges of our listening range (the very lows and the very highs) you can get a wider mix too.
That is an example of the interconnection between the dimensions of height and width.
Remember that a great mix is achieved by having the right amount of clarity, separation, balance, and space.
Talking about good practices I'd say don't rely just on headphones when mixing since they give a different perception of width from what monitors do, the most important difference being that what comes from the left channel arrives just to the left ear on headphones, also there is no natural reverb wearing them so the depth feeling may be compromised too (actually also the height parameter, because bass frequencies are more difficult to balance on headphones where you don't have a physical perception of them).
There are some tools out there that try to do monitor simulation on headphones but actually, it all comes down to knowing what you are listening to.
A not-so-known mixing technique is the LCR approach, which stands for Left, Central, and Right, a panning technique where all panpots are set to either left, center, or right—nothing in between.
I've not tried this yet, but some engineers claim that in some situations where you want each element to sound distinct it can work well for the following advantages:
[I'm quoting the Presonus blog for the following points]
" - The resulting mixes sound very wide without having to use image processing because there’s so much energy in the sides.
- It simplifies mixing decisions because you don’t have to agonize over stereo placement.
- Mixes translate well for those not sitting in stereo’s “sweet spot,” because the most important material is panned to the center.
- It forces you to pay attention to EQ and the arrangement, to make sure there’s good differentiation among instruments panned hard left and hard right.
- If an LCR mix leaves “holes” in the stereo field, then you can use reverb or other stereo ambiance to fill that space. As one example, stereo overhead mics on drums can pan hard left and hard right, yet still fill in a lot of the space in the middle. Or, place reverb in the channel opposite of where a signal is panned. "
Of course, this is a practice not applicable to all genres, it may be most suited to pop and rock music, but surely not for orchestral music where you want to employ the entire range of the panpot for realism.
In mastering the aim is to optimize the three dimensions of mixes already covered, before touching loudness (a topic I'll cover in the future), width being one of them.
I'm not going to dissert any longer since I can't say everything in a single blog post (for example we didn't talk about width in non-stereo or immersive mixing scenarios);
for that reason, I'll talk about mastering and more of that in the next episodes, so stay tuned...
- BONUS: Building a Psychoacoustic Panner!
To wrap things up let's build a psychoacoustic panner rack which can give us a much more realistic sense of space than what simple panning can usually do
[I'll give this as a freebie at the end of the article 😉].
I must credit Computer Music Magazine for this idea and realization since it's very clever. The goal is to build over the panning concept with some more advanced stuff coming from the study of psychoacoustics, which tries to understand how the human brain decodes sound in the real world.
Apart from level differences or ILD (Interaural Level Differences), there are many more auditory cues that our brain uses to interpret where a sound is coming from:
time differences or ITD (Interaural Time Differences; we've seen the Haas or precedence effect), head absorption, distance effects, and tonality in the form of comb filtering inside our ears (there is a complex pattern of reflections happening in our outer ear which causes that naturally).
Here we're not going to consider the last mentioned since it's very complex and some plugins like those made by Dear Reality have deep algorithms that try to simulate a 3D space with controls over the azimuth and elevation of a sound source too.

Furthermore, our brain pays more attention to time differences or ITD for frequencies below 1Khz and level differences or ILD for frequencies above that approximately (this is such a fascinating area of study for our perception of pitch too).
In the rack I made I put those ideas together to create just one single 'PsychoPan' control which is mapped to many devices.
To summarize, they create time differences between the two channels for frequencies below 1Khz using the free Voxengo Sound Delay plugin;
level differences (what a simple panpot does) above 1Khz with the added high-shelf cut of 3dB starting from 5Khz to either the left or right channel to simulate head absorption (when a sound comes from the right, our left ear receives a slightly darker tone due to our head behaving like a filter).
Also, since we filtered the Haas effect (created with time differences between the channels) we have a more mono-compatible effect than the full non-filtered version.


In the example below listen to the differences between a standard panning effect and our 'psychoacoustic panner' device! (Put on your headphones to better hear this).
First, you'll hear a guitar loop moved to the right and then to the left with the standard panpot, then from the left to the right, and then to the left again with our psycho-panner device.
Notice how the standard panner completely kills to silence the other channel when set to extreme values (that's why hard panning usually sounds very unnatural and sometimes is avoided, in fact in the real world we don't hear a sound with one ear only!).
3. Conclusion
This was the longest blog post I've written so far, so if you have arrived so far first a huge congrats and thanks! It's always my hope you can find these readings helpful and inspiring, so my only best reward would be a comment or a like to this post.
I'll catch you next time with more music production tips!
Happy Music Making,

P.S.: Click the artwork below to download the rack for free!
